Ricoh GR III Best Settings for Night Street Photography with Help And Tips.
These best settings for night street photos also applies to the Ricoh GR III Street Edition, the Ricoh GR III Diary Edition and the Ricoh GR IIIx Urban Edition.
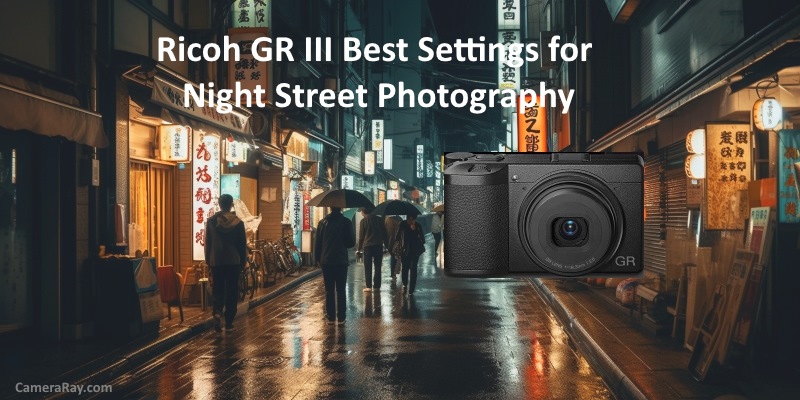
The Ricoh GR III has earned a cult following amongst street photographers for its compact size, discreet design, and outstanding image quality. The camera’s APS-C sensor and the sharp 28mm equivalent f/2.8 lens make it an excellent choice for night street photography. In this article, we will explore the best settings for the Ricoh GR III to help you capture stunning night street images that will make your portfolio stand out.
Understanding the Camera’s Strengths:
Before diving into the settings, it’s crucial to understand the strengths of the Ricoh GR III for night street photography. Its strengths include:
Compact and discreet design: The small size and unobtrusive appearance make it easy to carry around and shoot without drawing attention.
APS-C sensor: The large sensor delivers excellent image quality, even in low light conditions.
Fixed 28mm equivalent f/2.8 lens: The wide-angle lens captures more of the scene and performs well in low light, thanks to its wide aperture.
Now that we have identified the strengths of the Ricoh GR III let’s discuss the settings that will help you make the most of this powerful camera for night street photography.
Find best deals on Ricoh GR III accessories here on the cheap.
Shooting Mode:
For night street photography, it’s best to shoot in Aperture Priority mode (Av). This mode allows you to control the aperture, while the camera automatically adjusts the shutter speed for the correct exposure. Shooting in Aperture Priority mode will enable you to prioritize depth of field and low light performance.
Aperture:
The Ricoh GR III’s 28mm equivalent f/2.8 lens is a significant advantage for night photography. To make the most of it, set the aperture to f/2.8 to capture as much light as possible. This will also give you a shallow depth of field, isolating your subjects from the background and creating a pleasing bokeh effect. If you want more depth of field, you can stop down the aperture, but keep in mind that it will reduce the amount of light entering the camera, potentially leading to slower shutter speeds or higher ISO values.
ISO:
Balancing ISO is essential for night street photography. A higher ISO will allow you to use faster shutter speeds, reducing motion blur and camera shake. However, it will also introduce more noise into your images. With the Ricoh GR III, it’s generally safe to shoot up to ISO 3200 without compromising image quality. To maintain a balance between noise and shutter speed, start with an ISO value of 1600 and adjust as needed based on your shooting conditions.
Shutter Speed:
As mentioned earlier, when shooting in Aperture Priority mode, the camera will automatically adjust the shutter speed. However, it’s essential to keep an eye on the chosen shutter speed to avoid camera shake or motion blur. For handheld shots, try to maintain a shutter speed of at least 1/60th of a second. If you notice the camera selecting slower shutter speeds, increase the ISO value to compensate.
Autofocus:
In low light situations, autofocus can struggle to lock onto subjects. To overcome this, use the Ricoh GR III’s Snap Focus mode. This mode allows you to preset a focus distance (e.g., 2.5 meters) and quickly switch to manual focus by pressing the shutter button halfway. This technique enables you to capture sharp images, even in challenging lighting conditions.
Image Stabilization:
The Ricoh GR III features a 3-axis in-body image stabilization system that helps reduce camera shake when shooting handheld. Ensure that the image stabilization is enabled in the camera settings to take advantage of this helpful feature.
RAW vs JPEG:
Shooting in RAW format provides more flexibility in post-processing, which is particularly beneficial for night street photography. RAW files contain more data and dynamic range, allowing you to recover details in shadows and highlights and adjust the white balance more effectively. While RAW files are larger and require more storage space, the benefits in terms of image quality and editing flexibility make them the preferred choice for night photography. If you’re concerned about storage, you can opt for the RAW+JPEG option, which saves both file formats simultaneously.
White Balance:
Accurate white balance is critical for night street photography, as artificial light sources can produce a variety of color temperatures. Setting the white balance to “Auto” allows the Ricoh GR III to automatically adjust the color temperature based on the scene. However, for more control, you can manually select a white balance preset (e.g., Tungsten or Fluorescent) or use a custom white balance setting based on a gray card or white surface.
Metering Mode:
For night street photography, the best metering mode to use is “Spot” or “Center-weighted.” These modes help you achieve a more accurate exposure by focusing on the most critical part of your composition. “Spot” metering measures light from a small area in the center of the frame, while “Center-weighted” metering measures light from a larger central area.
Noise Reduction:
Although the Ricoh GR III performs well at higher ISO values, you may still encounter some noise in your images. To combat this, you can enable the camera’s built-in noise reduction feature. Keep in mind that noise reduction can sometimes result in a loss of detail, so experiment with different settings to find the right balance for your images.
Night street photography can be challenging, but with the right settings, the Ricoh GR III is a powerful tool for capturing stunning images. By optimizing your aperture, ISO, shutter speed, autofocus, image stabilization, and other settings, you can create captivating night street photographs that showcase the beauty and drama of the urban environment after dark. Remember to experiment, practice, and have fun as you explore the world of night street photography with your Ricoh GR III.
You may also want to consider the best small flash for street photography – The LightPix Labs FlashQ Q20II