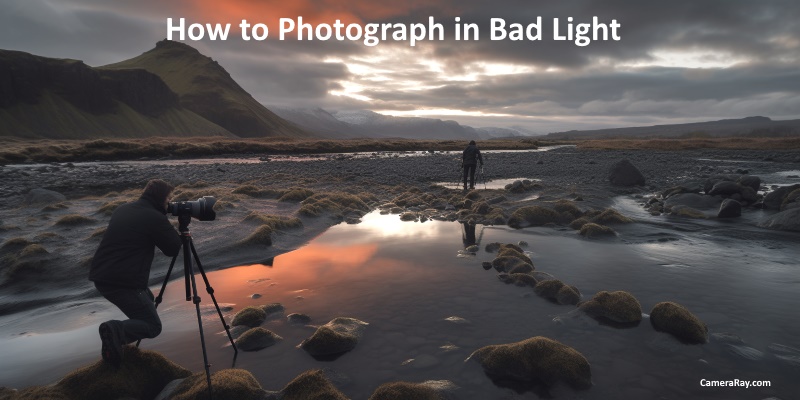
How to Photograph in Bad Light: Harnessing the Challenge.
As any photographer knows, light can be your greatest ally or your worst enemy. In ideal situations, natural lighting provides the perfect balance, highlighting the subject and filling the space with life and vibrance. But what happens when the conditions are far from ideal? What happens when you’re tasked with photographing in bad light? Although it can be challenging, even bad light can be harnessed to create striking and memorable photographs. This article will guide you on how to photograph in poor lighting conditions.
Understanding “Bad Light”
Before diving into how to manage bad light, it’s essential to understand what we mean by the term. Bad light can refer to various situations, from extremely harsh, direct light that produces strong shadows and overexposes parts of the image, to low light that may render your subject indistinct or cause a loss of detail.
Learn to Leverage Lighting Conditions
Every lighting condition has unique characteristics that you can leverage to your advantage. For instance, shooting under harsh midday sun can be challenging due to high contrast and sharp shadows. But with the right approach, this kind of light can lead to incredibly dramatic, high-definition images.
Shooting in low light, on the other hand, is typically associated with a loss of detail and the introduction of digital noise in the image. However, these conditions can also produce moody, atmospheric images that play with darkness and shadow in interesting ways. Understanding the unique opportunities and limitations presented by different types of bad light is crucial.
Techniques for Managing Bad Light
Diffusing Harsh Light
In situations where the light is too harsh, one effective approach is to use some form of diffusion. This might involve positioning your subject in the shade or using a light diffuser or reflector to soften the light. Shooting in RAW format can also be helpful, as it provides more leeway to recover details from overexposed or underexposed areas during post-processing.
Embrace Shadows
Sometimes, embracing the shadows can lead to striking and dramatic images. Use harsh light to create sharp contrasts and play with interesting shadow patterns. Look for areas of interplay between light and shadow, and see how these can create unique compositions.
Using Flash in Daylight
This might sound counterintuitive, but using a flash can help fill in the shadows in harsh daylight conditions, especially when photographing people. This technique, known as fill flash, can help even out the harsh contrasts that can make faces appear overly dark or bright.
Leveraging Low Light
In low light situations, your primary challenge is getting enough light on the sensor to properly expose the image. Here, adjusting your camera’s settings can make a significant difference. Increase your ISO, but be careful of introducing too much noise into your image. Open up your aperture to let in more light, and slow down your shutter speed to allow the sensor more time to gather light. Be mindful, though, that slower shutter speeds may introduce blur from camera shake or subject movement, so a tripod can be incredibly beneficial.
Harnessing Artificial Light Sources
In a low-light environment, any available light can be a boon. Streetlights, neon signs, car headlights, or even a smartphone flashlight can serve as a light source. These can create interesting color casts and lighting effects that can add to the atmosphere of your images.
Post-Processing
Regardless of the in-camera techniques you use, post-processing is often key when dealing with images shot in bad light. Software like Adobe Lightroom or Photoshop can be invaluable for tweaking exposure, shadows, highlights, and color balance, helping to correct the problems associated with bad light.
Expanding your Photography Skills
Photography is an art, and like any other art form, the best results often come from embracing and overcoming challenges rather than avoiding them. Shooting in bad light is a way to push the boundaries of your skills and create stunning and unique images that stand out from the crowd. It’s all about learning how to use the light you have, rather than lamenting the light you don’t.
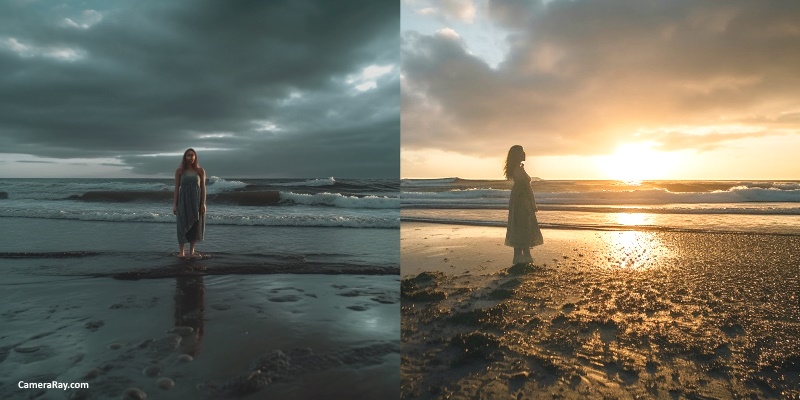
Make Use of the Golden and Blue Hours
While not necessarily bad light, the moments before sunrise and after sunset, often referred to as the golden hour and blue hour, respectively, can present unique challenges and opportunities. With softer, diffused light, and stunning colors, these times can yield spectacular photos. However, the rapidly changing light conditions can be tricky to navigate. Consider investing in a quality tripod and make use of longer exposure times to fully capture these moments.
Master the Manual Mode
Relying on your camera’s auto mode may yield acceptable results in favorable light conditions, but challenging light scenarios require a deeper understanding of your camera’s manual settings. Understanding the exposure triangle — the relationship between ISO, shutter speed, and aperture — will allow you to make necessary adjustments depending on the lighting situation.
In low-light conditions, open your aperture to its widest setting to let in as much light as possible, slow your shutter speed to allow the sensor more time to gather light, and consider raising your ISO, but watch for excessive noise.
In overly harsh light, consider closing down your aperture, speeding up your shutter, or even reducing your ISO to its lowest setting. Each of these changes will help reduce the amount of light hitting your sensor and can help manage overexposure.
Bracketing and HDR
Bracketing involves taking multiple shots of the same scene at different exposure levels. This technique can be helpful when dealing with high contrast scenes, such as those found in harsh sunlight. You can then blend these images in post-processing to create a single image with a more balanced exposure, a technique known as High Dynamic Range (HDR) imaging.
Use a Polarizing Filter
For times when the light is overly harsh, a polarizing filter can help reduce reflections, darken skies, and suppress glare. These filters can help control the intensity of light that enters the lens and reach the sensor, allowing you to maintain more balanced exposures even in challenging lighting conditions.
Practice and Patience
Lastly, remember that mastering any skill, including photographing in bad light, takes time and practice. Don’t be discouraged if your early attempts don’t yield the results you’re hoping for. Instead, use these experiences as opportunities to learn and grow.
Remember, the goal is not to avoid bad light but to understand how to work with it, control it, and even embrace it. As you gain experience and confidence, you’ll find that what you once saw as “bad light” can be transformed into “creative light,” opening up a world of photographic possibilities. The key is patience, practice, and the courage to explore and experiment with your photography.
So, embrace the challenge of photographing in bad light, and watch as it opens up new avenues for creativity in your work. You may find that the images you capture in these challenging conditions are among your most engaging and memorable.
You can find some great books on learning photography here that will help you along.